
Data Replication in IRI Workbench
Data replication means copying data from one place to another, and is usually done between users of different databases who need to share the same level of information. Replication can also involve other data sources and targets, and become more complex in transformation and temporal terms.
This is the first of two articles covering database replication in the IRI Workbench GUI. IRI Workbench is the free IDE built on Eclipse™ that supports all IRI products, including IRI NextForm (for data and database migration) and IRI Voracity (a total data management platform that includes NextForm et al.). IRI Workbench creates and runs data replication jobs through wizards, scripts, and workflow diagrams.
Here are some of the ways in which replications occur:
- Data in one database is copied into another database on the same or another server.
- Data from two or more databases are combined into a single database.
- Users get full initial copies of the database and then periodic updates as data changes.
- Data are selectively extracted from a database and replicated in an external file.
Data replication allows you to replicate only a part of database; i .e., selected tables, columns, and/or rows. Replicating all of the tables is part of database mirroring. However, changes to schemas, constraints, procedures, and access authorizations are not as easy to replicate, and may involve separate processes.
Basic Example in IRI Workbench
We will use a job creation wizard from the NextForm menu in the IRI Workbench toolbar for this first data replication example. We will copy data from an Oracle table into both a MySQL table and a modified flat file. This second article demonstrates the replication of only updated data in a table by evaluating timestamp column values.
The NextForm menu contains three job creation wizards:
- New Reformat Job
- New Single Source Migration Job
- New Multi Table Migration Job
We will use the New Reformat Job wizard to perform this replication. For a more complex job, we would use a different NextForm wizard, or an ETL job wizard in the Voracity menu (or manually build a new workflow).
Here are the structure of the source and target tables:

Step 1: Specify the Name and Job Options
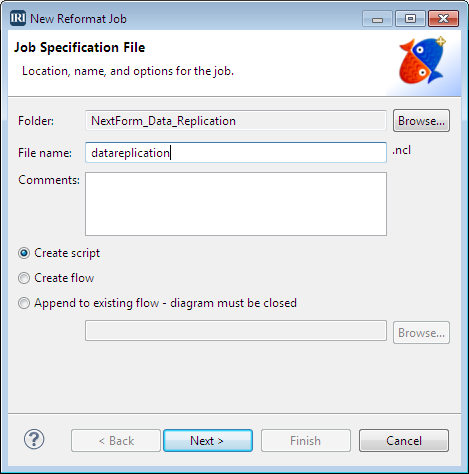
From the NextForm menu on the top toolbar, select the New Reformat Job wizard. For this example, enter the job file namedatareplication. NextForm adds the extension .ncl. You can also add any relevant information about this job which will appear as comments in the script.
From the radio button list, leave the default selection of Create script because this is a standalone job and not part of a larger flow or batch project.
Step 2: Identify the Source
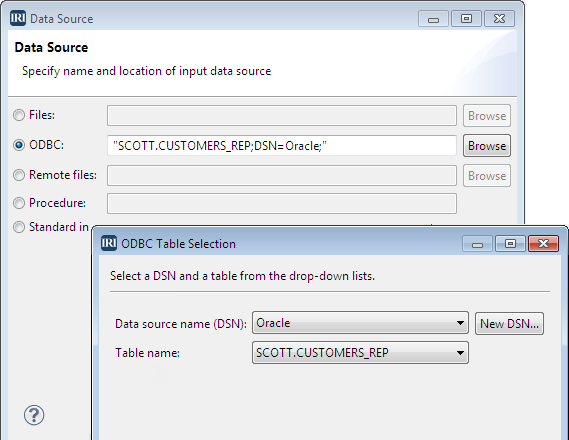
On the next screen, Data Sources, click Add Data Source. The source in this example is an ODBC-connected database, so select ODBC, and then click Browse to select the data source name (DSN) and table.
Step 3: Specify the Source Metadata
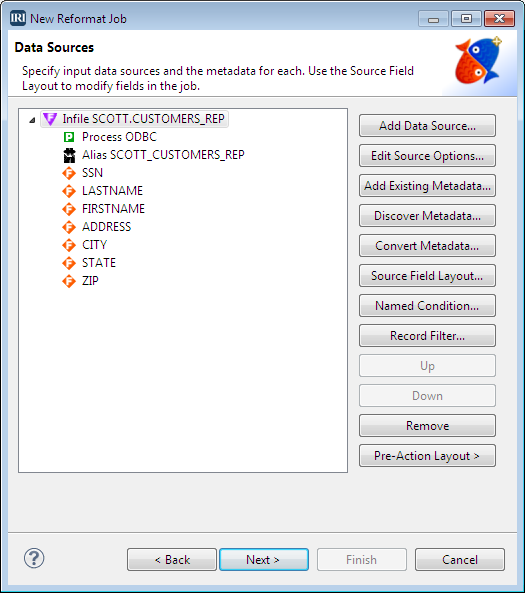
For IRI software to move and manipulate the data in its engine (in this case, replicate in NextForm), you need metadata for the source and targets defined in the job script, in IRI’s data definition file (DDF) format.
You can build the DDFs for any source (or target) automatically in IRI Workbench. That functionality is embedded here, where you can choose to either Discover Metadata or Add Existing Metadata. In this case, we will add existing metadata, which was created in a different way.1 That choice, and its results, are shown in the following dialog:
Click Source Field Layout to see the layout of the data.
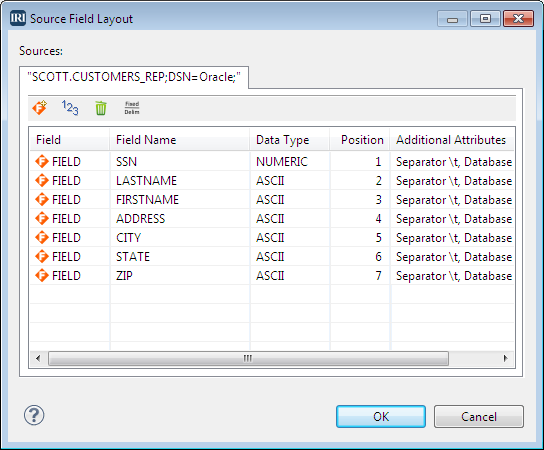
Click OK to close the Source Field Layout. Then click Next on the Data Sources page to open the Data Target page.
Step 4: Define the Target(s)
We are sending the replicated Oracle data to two targets: a MySQL table that we are namingcustomers_out, and a file called personout.csv.
Add a target table
Click Add Data Target. Select ODBC and click Browse. Then select the Data source name (DSN) Oracle and the table CUSTOMERS_REP. Click OK to close the dialog.
On the Data Targets page, highlight the table name and click Add Existing Metadata. Select cust.ddf (which was created earlier), and click OK.
We want to limit the number of records in this file to 100. Click Edit Target Options to open the editor, and in the Outcollect field, enter 100, and click OK.
Add a target file
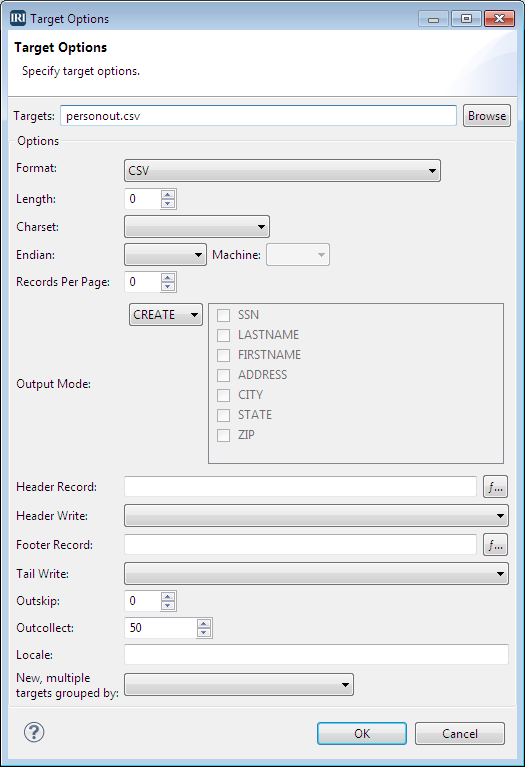
Again, click Add Data Target. Select File and enter personout.csv, and click OK. We want to limit the number of records in the file to no more than 50, and we also need to change the format to CSV. To do both, click Edit Target Options to open the editor. Change the Format field to CSV, and in the Outcollect field, enter 50, and click OK.
Add a string function to the target file
We will also add a string function to display only the last four digits of the SSN field. To do this, click Target Field Layout, and click the personout.csv tab.
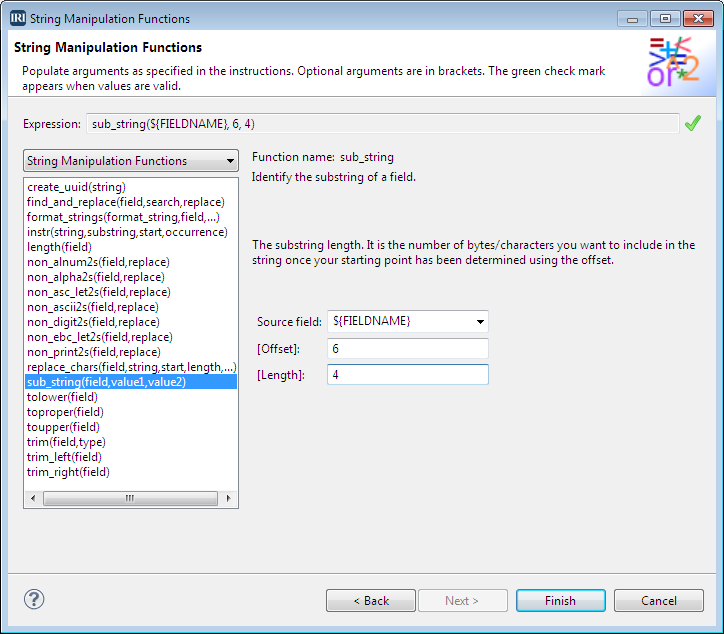
Select the SSN field, right-click and select Apply Rule > Create Rule. On the New Field Rule Wizard Selection page, select String Manipulation Functions. On the next page – String Manipulation Functions – select sub_string. In the Offset field, enter 6 for the number of characters from the left of the field, and in the Length field, enter 4 for the length of the substring, and then click Finish.
Add an include filter
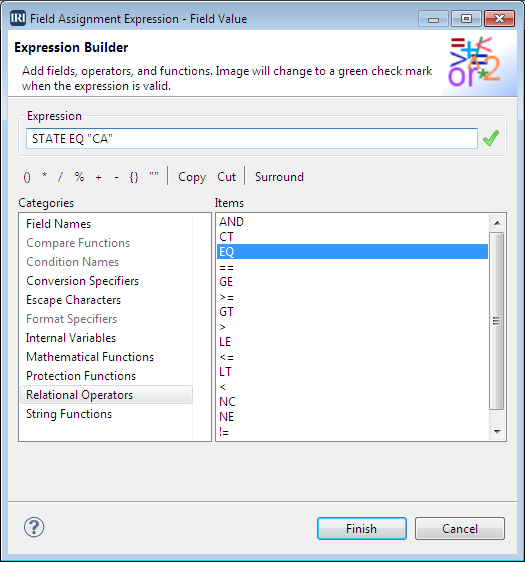
To continue modifying the CSV file, we will add a filter to limit the data to include only those records from CA. ClickRecord Filter to create the filter. Select Include for the Filter Action, and select New Condition for the type. Open the Expression Builder by clicking the Function icon.![]() In the Expression Builder, select the category Relational Operators and the item EQ. In the Expression field at the top, enter STATE EQ “CA” using the tools on the toolbar, and click Finish.
In the Expression Builder, select the category Relational Operators and the item EQ. In the Expression field at the top, enter STATE EQ “CA” using the tools on the toolbar, and click Finish.
Back on the Data Targets page, we decide to re-position the last and first name fields after the zip field. Select LASTNAME and click Down until the field is at the bottom of the list, then select FIRSTNAME and do the same.
When we are done adding both targets, the fields and modifications display on the Data Targets page.
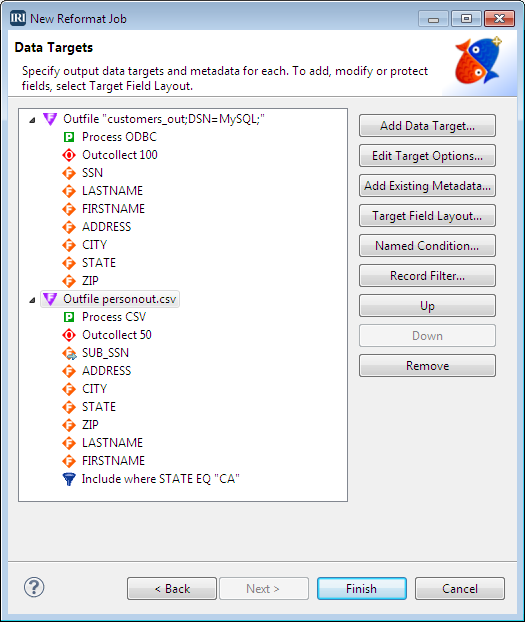
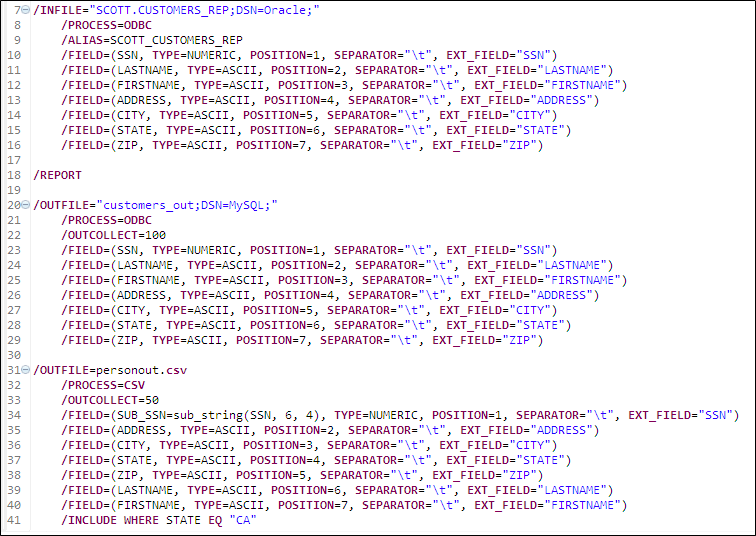
Click Finish to complete building the script, which is shown below in the color-coded, syntax-aware editor view of IRI Workbench:
Results
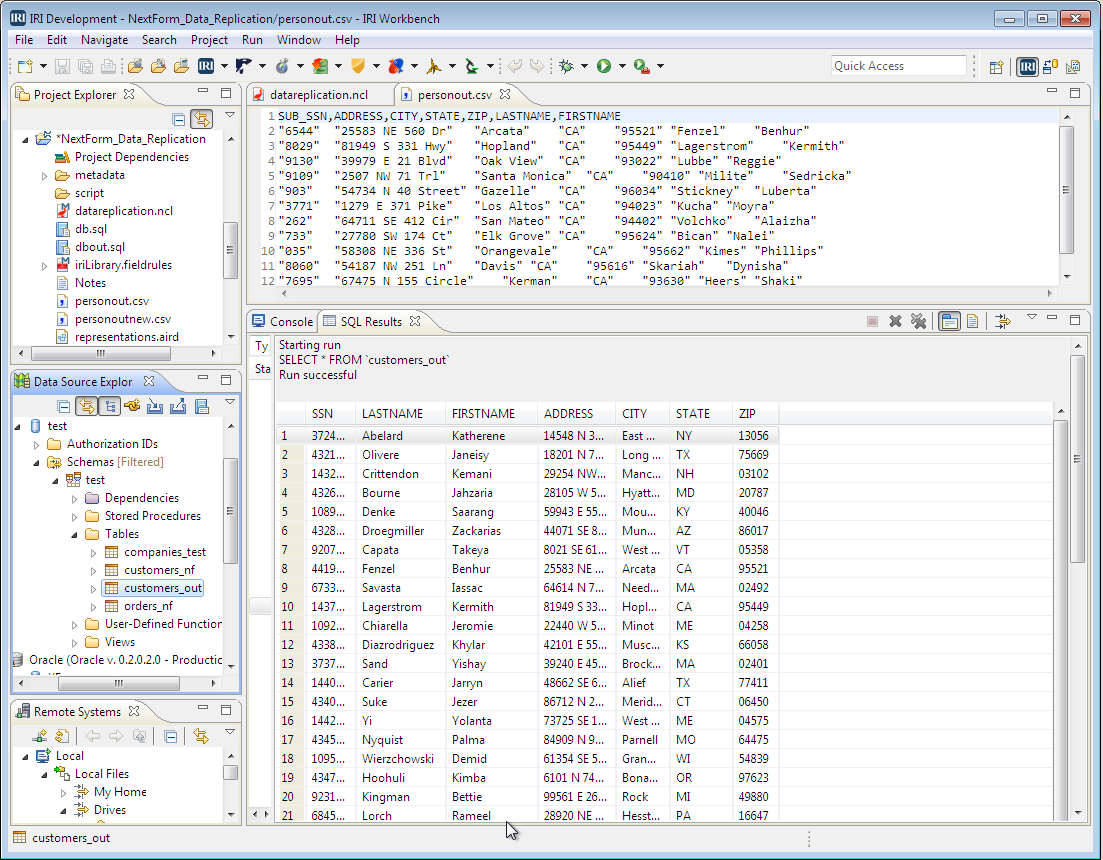
Run the job script by right-clicking in the script and selectingRun As > IRI Job. The target data is shown in the tabs open below:
If you have any questions about replicating data in NextForm or Voracity, contact your IRI representative.


