Using the RowGen Test Data Job Wizard
Unlike the New DB Test Data Job wizard for creating multiple, related test tables, the New Test Data Job wizard in the IRI Workbench GUI for RowGen generates individual test sets. In this article, we use this simpler wizard to create a CSV file with both randomly generated and randomly selected test values.
Start and Name the Job
From the top toolbar menu, select the New Test Data job wizard from the RowGen (windmill icon) menu.
Enter a filename in the File Name field to name the job script. This is the RowGen control language (RCL) metadata file defining the data generation.
You can later modify, schedule, and run this job from the GUI, or on the command line.
Select the Create Script radio button. Click Next.
Step 2:
Define the Target Size
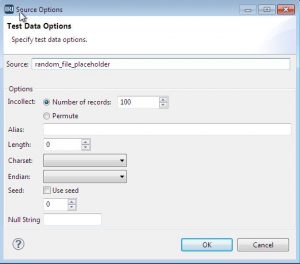
In the Test Data Definition Screen, click Test Data Options to change the Incollect value (which specifies the number of rows to generate in your target), and define the fields.
Step 3:
Define the Test Field Generation
By default, RowGen will generate random values for the data type specified for each field (the default is ALPHA_DIGIT). However, in each field, you can also specify random selection from a range of values specified directly in the script, or from real data in a (ASCII, tab-delimited) set file you select or create in the GUI’s Set File wizards.
To define the fields, you must use or create a new data definition file (DDF) layout. Select from:
- Add Existing Metadata, to use a DDF from CoSort/SortCL, NextForm, or FieldShield jobs.
- Discover Metadata, to auto-create and use a DDF file from an existing file or table.
- Convert Metadata, to turn a supported metadata file (e.g., COBOL copybook) into a DDF.
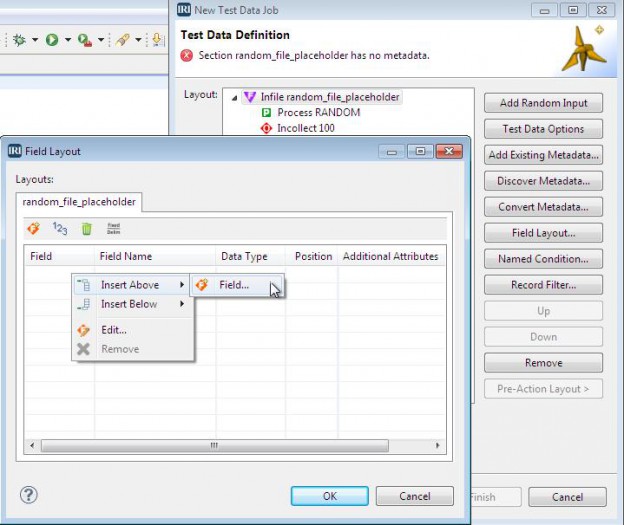
- Field Layout, to open a tabular editing window where you create each field attribute individually … which we will do in this case to show how fields are defined anew.
Add a field by right-clicking in the table. The Generation Field editor opens to the Layout tab, with FIELD1 as the default field name and ALPHA_DIGIT data type, which you can change. Random values will be generated for this field, for which you must define a size or separator. Click on the ? button for help content to review the many other field-specific layout attributes.
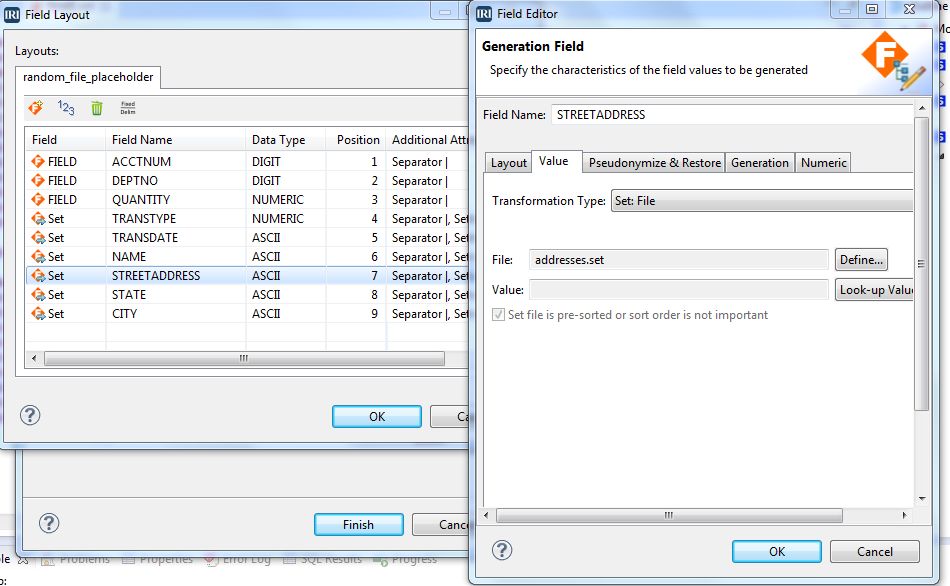
To randomly select field data instead, start the same way; i.e., right-click to add or edit an input field. In the Generation Field dialog, review the field Layout attributes, but move into the Value tab. From the Transformation Type menu, select Set: File and browse to a .set file you have.
If you do not have a set file, click Define, and in the Set File Selection dialog, click Create. Then choose a mini-wizard option to define a set file from: 1) connected DB column values; 2) a range of (or literal) values; or, 3) custom-formatted compound data values you build in pieces.
Step 4:
Define and Review the Target Layout
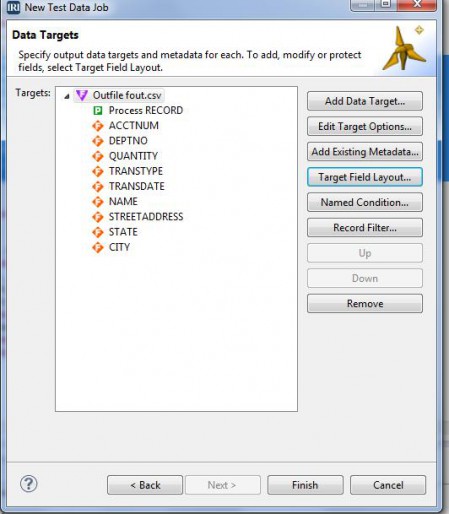
Use the Data Targets dialog to define output layout(s). While many people just re-use their input layout, you can define one or more targets in the same or different format. You can remap, convert, select, aggregate, and otherwise transform the field data generated in the input phase.
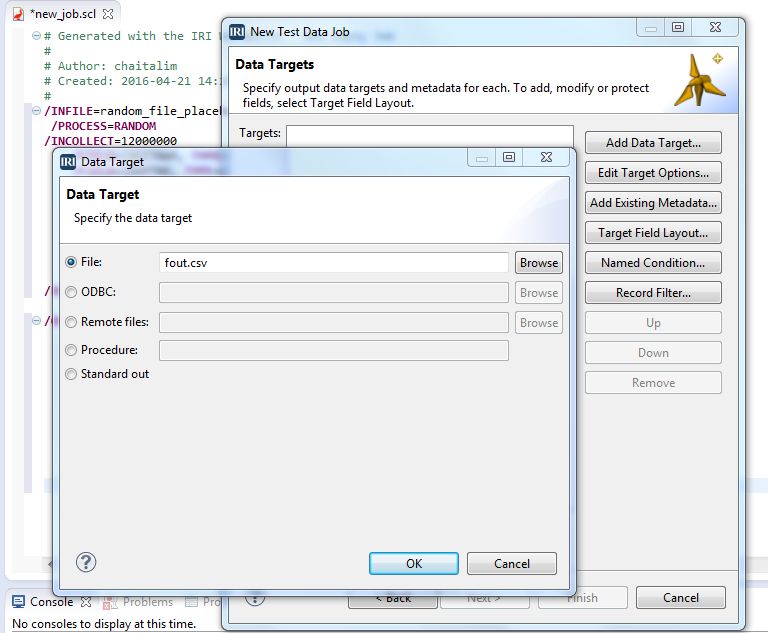
Making no changes in this case, my target fields appear in the same order, and I can Finish.
Step 5:
Review and Run the Job
After you click Finish in the final wizard dialog window, the RowGen Control Language (RCL) Script you produced will appear in the Workbench’s color-coded syntax editor. You can modify the job in the editor window (or any text editor) directly, through the outline view (right-click on the elements), or in dialogs launched from the IRI menu exposed from a right-click in the editor.
To run the job script and produce the test data, right-click on the job in the project explorer, or in the script window, and select Run As > IRI Job. You can also select the Run As option from the toolbar’s green play (run) menu.
The job can also run from the Workbench’s built-in task scheduler. The scheduler configures timed launch of any tasks defined and saves as a Workbench or external tool run configuration.
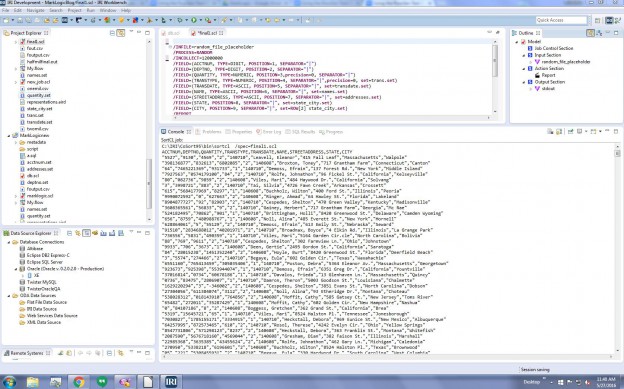
The screenshot below of the upper window in IRI Workbench displays the top (generation) section of the job script. The lower window shows the test file generated on running the job:
Contact rowgen@iri.com if you need help with this or another RowGen job wizard.

