
Running Voracity Jobs in Hadoop
Many of the same data manipulation, masking, and test data generation jobs you can run in IRI Voracity® with the default SortCL program can now also run seamlessly in Hadoop™. See this article to help you decide when to run Voracity jobs in Hadoop.
When you do decide to run Voracity jobs in Hadoop, you can choose between MapReduce 2, Spark, Spark Stream, Storm, or Tez engines. You just need a VGrid Gateway license from your IRI representative, and a Hadoop distribution to run them (see below).
Following are the steps to set up and run jobs in Hadoop from the IRI Workbench for Voracity, built on Eclipse.™ For specific instructions for you distribution, also see our connection instruction articles for using Voracity with Cloudera, HortonWorks, and MapR.
VGrid Gateway
To run jobs in Hadoop, you must connect to your Hadoop cluster through Voracity’s gateway server, VGrid.
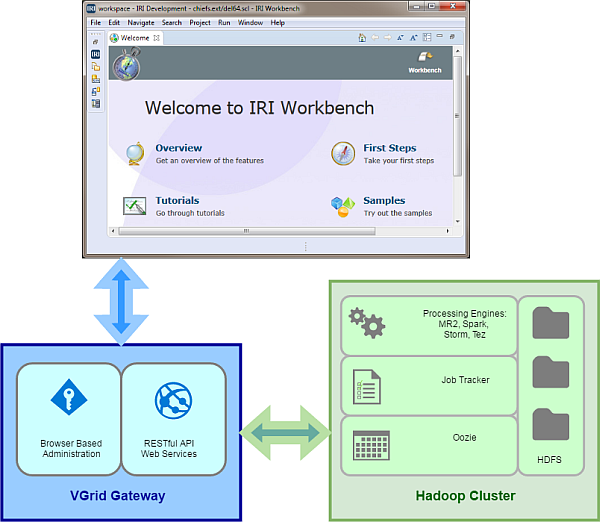
Like everything else you do to design and manage jobs in Voracity, you configure your connection to VGrid from within IRI Workbench.
Refer to the Job Deployment instructions on this page to connect VGrid to your Cloudera, HortonWorks (Ambari) or MapR distribution. IRI can also provide a free sandbox distribution for testing as well.
Set up this access in IRI Preferences for the VGrid Gateway in Workbench as follows:
- From the Windows menu in the top navigation bar, open Preferences.
- In the left pane, select IRI -> VGrid Gateway.
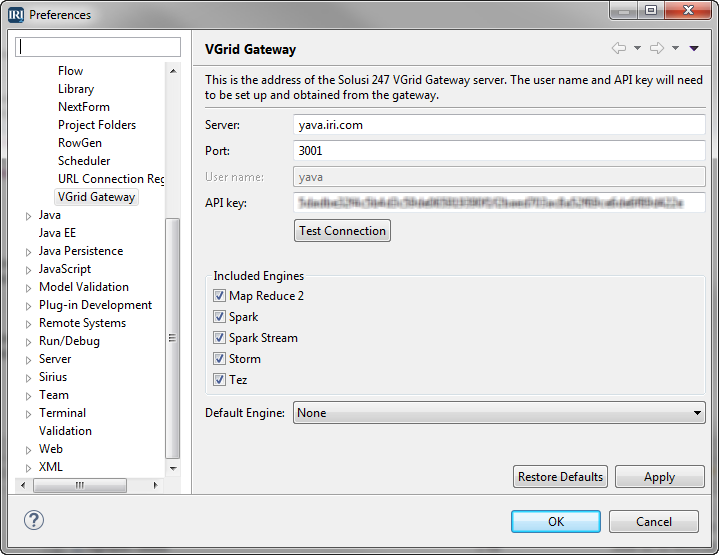
- Complete the fields with the information that was provided.
- Click Test Connection to ensure that the connection is working.
- Optionally, change the settings for the Hadoop engine selection. When a job script is converted to run on Hadoop, it can use various frameworks, or engines. Restrict the engines that are presented as options by deselecting the corresponding check boxes. Select a default engine from the ones that are checked, or if only one engine is to be used, uncheck the rest, and set the default to the desired engine.
Open the Hadoop Views
The IRI Workbench has several built-in view points for interacting with your Hadoop environment once you’re connected to it.
- From the Windows menu in the top navigation bar, select Show View -> HDFS Browser. The HDFS Browser view opens in the bottom center of the Workbench.
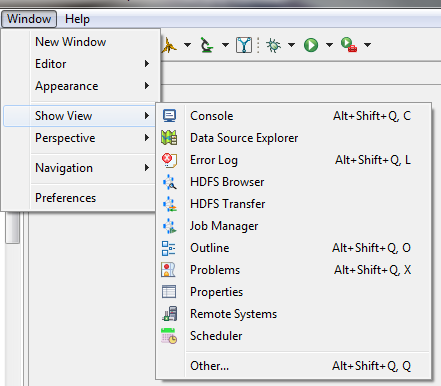
- Continue using Show View to open the HDFS Browser, Transfer and Job Manager views.
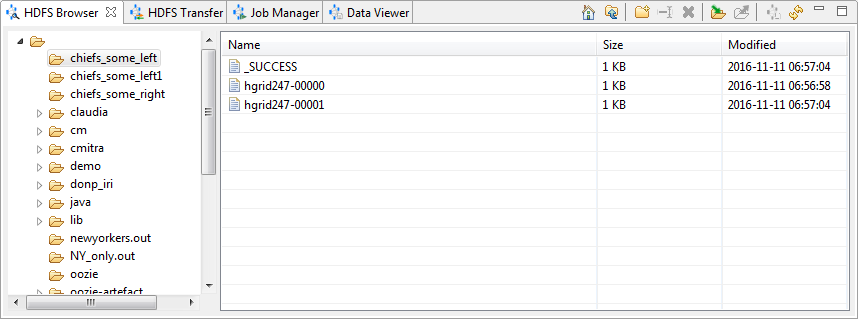
HDFS Browser
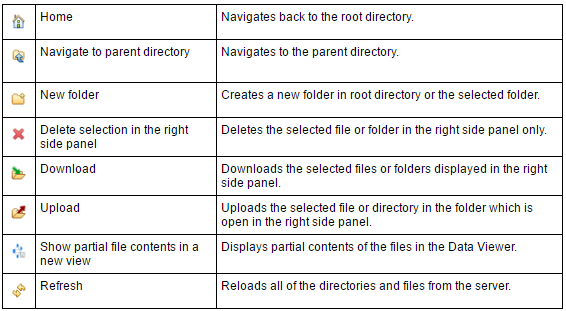
The HDFS Browser lists the files and directories on a Hadoop file system, and allows common file operations to be performed. You can upload and download files, delete files or folders, navigate to a parent folder, and view partial contents in the Data Viewer.
This table describes the icons and functions of the HDFS Browser:
The HDFS Browser’s left panel lists the root directory and subdirectories. The right panel lists the contents of the directory selected in the left panel, along with the size and last modified data of each file:
HDFS Transfer
Use HDFS Transfer to move files between the HDFS server and the local directory by dragging and dropping them.
The HDFS Transfer view includes a view of the browser on the left and the HDFS server on the right. Like the browser view, each side includes the directory structure and file details in three columns: Name, Size, and Modified.
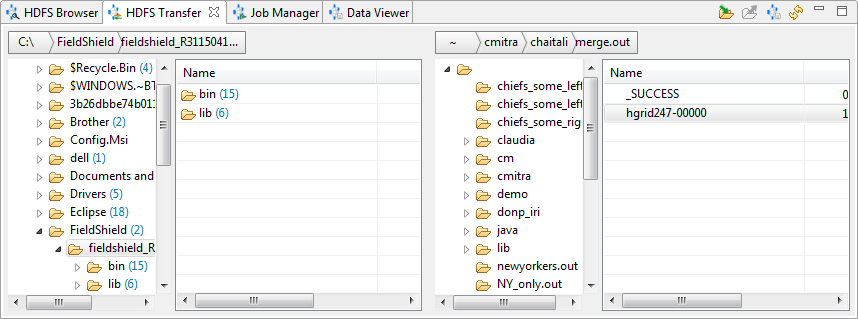
Right-click in the local directory structure to create a New Folder, or Refresh the view. Right-click in the directory contents to Upload or Delete a folder or file.
On the server side, right-click in the directory structure to create a New Folder or Refresh. Right-click in the directory contents to Download, View Data (partial), or Delete a folder or file.
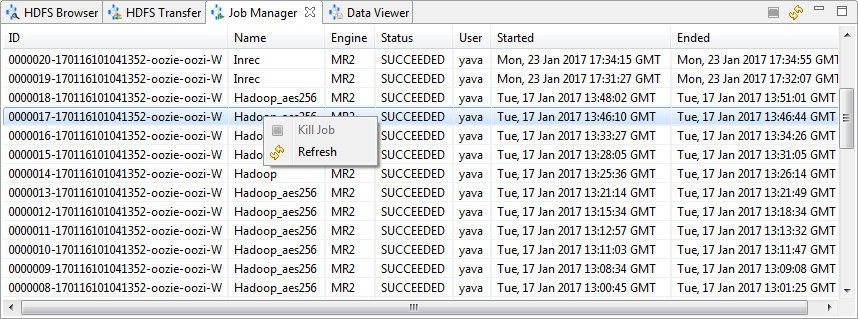
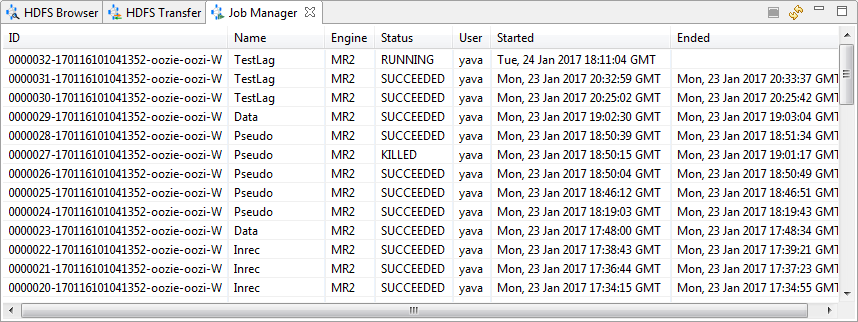
Job Manager
Use Job Manager to view information about the jobs on the server.
Job Manager details include the job ID, its name, and the engine the job is using, as well as the current job status, and the date and time the job started and ended.
Right-click anywhere in the view to Refresh. Right-click on a job that has not completed to Kill Job.
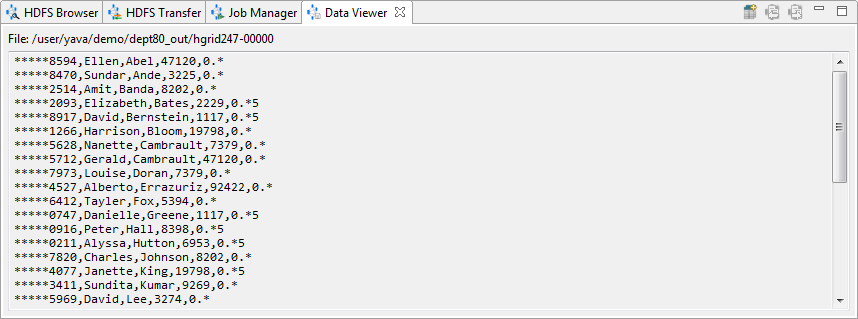
Data Viewer
Use the Data Viewer to view the contents of a file. A new view opens for each file selected. Click the X on the active viewer tab to close.
The table below describes the icons and functions of the Data Viewer.
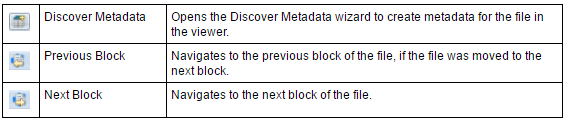
Double-click the name of a file in another view to open the Data Viewer. A new Data Viewer opens each time, so numerous ones may be open at the same time. Click the X on the Data Viewer tab to close the view.
Prepare the Job
- Create a Hadoop-supported Voracity job (script) by hand or in the GUI automatically. Note that the metadata must be included in the script, not in a separate DDF. If the source data is not in HDFS, continue to steps 2 and 3; otherwise, go to Launch Your Job below. We are working on the ability to launch multi-task batch jobs in Hadoop, next.
- Create a folder on the Hadoop remote server for this job.
a. Open the HDFS Transfer view. In the server side (right), select the parent folder for the new folder, either the root directory or another existing directory. Right-click and select New Folder.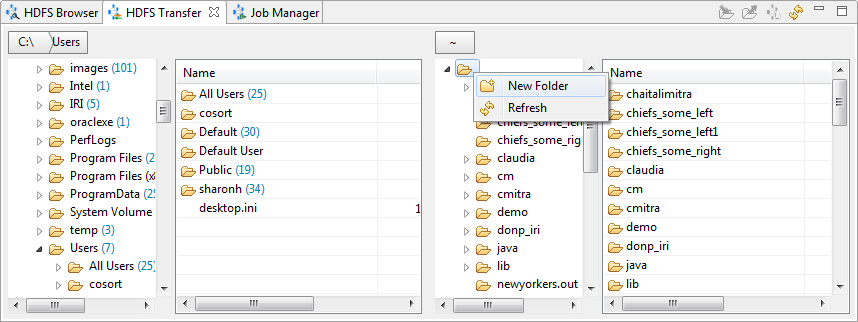
b. Enter the name of the folder in the dialog that opens, and then click OK. Confirm that your folder was created. Now select the folder. - Upload the source data for the job to the new folder.
a. On the HDFS Transfer view, in the local directory side (left), find and open the folder containing the input files. Select the files for the job.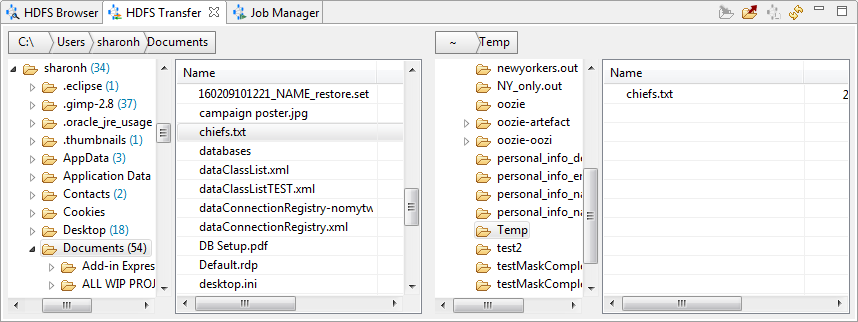
b. Click the Upload icon . Confirm that the files are in the new directory on the remote server.
Launch Your Job
- In the Project Explorer, right-click on the script and select Run As -> IRI on Hadoop. The Select Run Configuration dialog opens.
- The matching run configurations for the selected job are listed. Each configuration has two required parameters: engine (platform) type and working directory. If these parameters have not been set, the value shown will be <not set>.
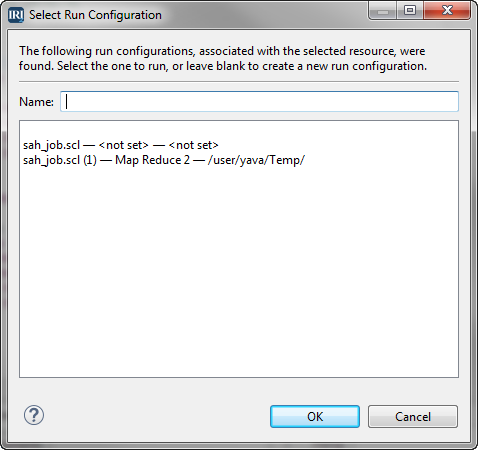
- Select the configuration to be used, or leave the Name field blank and click OK to open the Edit Configuration page. If the parameters for the configuration you selected are not set, the Edit Configuration page opens. If you select a run configuration and the parameters are set, the job will run without further input.
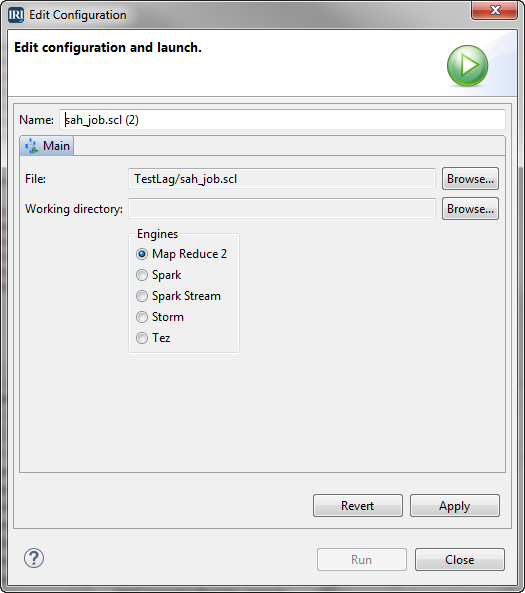
- On the Edit Configuration page, in the Working directory field, browse to the directory on the remote server. Select the engine to use. Click Apply. Click Run to launch the job.
- Open the Job Manager view to see the job running.
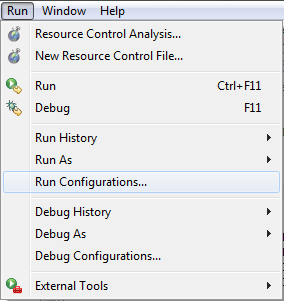
You can also create the run configuration before starting the job using Run Configurations. Open Run Configurations by right-clicking on the script in the Project Explorer or from within the open script. Select Run As -> Run Configurations.
You can also open Run Configurations from the Run As icon on the toolbar, or from the main Run menu atop the Workbench screen.![]()
Contact voracity@iri.com for help or additional information.


